I made this easy tutorial to help you create your own DIY mountain mural, just like the one I painted for a new Mike Holmes TV show called, “Holmes Next Generation.” You can watch it on The DIY Network, HGTV or CTV Life.
Fellow DIYers, tag me on Instagram at @about_murals so I can see your masterpiece or leave a Google Review if this helps you.
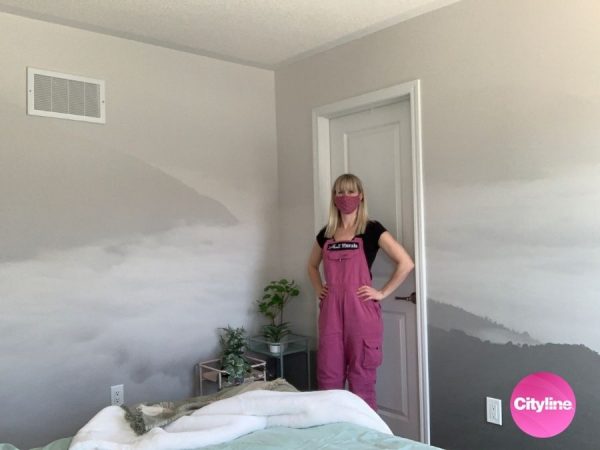
Here’s the Mountain Nursery

Here’s the grey mountain nursery I helped Sherry Holmes and Mike Holmes Junior create for baby Cohen. It’s just begging to be pinned to your board, right? :)
Step 1 – Create a Sketch of the Mountain Mural

I know you want to get to the fun part (painting) but honestly, the most important part of a DIY mountain mural is to make a solid to-scale sketch on graph paper. I promise, it saves you time and headaches in the end.
For this sketch, I cut out the geometric mountains, snow caps, yellow triangles and forest so I could move them around. During the consultation with Sherry Holmes, she asked me to remove some of the triangles and make the rounded snow caps and forest more angular. I easily peeled these shapes off and replaced them with the new versions.
Here’s what the approved sketch looked like:

Once Sherry saw the sketch, she could now picture a more geometric mountain wall mural and knew the crib wouldn’t cover any of the important parts of mountain mural from the dotted lines.
Step 2 – Choose the Mountain Mural Paint Colors

There are so many colours you can paint mountain murals in (think purple, blue, black and white, orange, mint – too many to choose!), so feel free to swap my colours with yours. Keep it light on top and darker as you move down the wall.
In my consultation with the Holmes Group, we used Benjamin Moore paint chips to find different gray tones that matched and decided on the following paint colours:
Benjamin Moore:
- OC65 for the sky and other 3 walls in the nursery
- 2121-50 for the snow caps
- 2121-30 for the upper mountains
- 2121-20 for the lower mountains
- 2121-10 for the forest silhouette
- 2023-30 for the yellow sun and as the base colour for the triangles. It was also used to paint the closet doors.
*I needed a gallon of the OC65 to paint the whole room, but only the quart size of every other colour for the mural.
Americana Multi-Surface Metallic paint by DecoArt:
- Yellow Gold as the shimmer over the yellow triangles
*One 59ml bottle was enough to cover all the shimmery triangles with 3 coats.
Step 3 – Draw Mountains on the Wall

Using your sketch as a guide, measure and draw a dot at every peak and valley of the mountains. In my sketch, you can see the tip of the tallest left-sided mountain is 2′ from the wall and 1′ from the ceiling, so that’s where I added a dot.
Once you add every dot, use a level to draw lines from dot to dot, creating the outline of the mountains.
You may want to add two thumb tacks where the pink dots are in my photo. Keep reading to see why!
Step 4 – Tape Mountains on Top

Tape the upper mountains using green painters tape that follows the edge of your pencil marks. Press it firmly onto the wall using a damp cloth.

To make sure none of the dark grey paint bleeds onto the white background, I “sealed” the tape with some of the white background paint (OC65). This is how I get crisp paint lines every time!
You can read another blog post where I share this super sneaky trick in more detail.
Step 5 – Paint Mountains on the Top

Once the white paint dries and has sealed the tape, you’re ready to paint the upper mountains!
Make sure to bring the grey paint (2121-30) down to the pencil line of the lower mountains. If you’re really particular (like I am), you’ll paint just below that pencil line and redraw the line later to get a perfectly crisp line on the lower mountains and full coverage (no streaks) in the upper mountains.
Step 6 – Tape Mountains on Bottom

Once the upper mountains dry, tape mountains on the lower section of the wall mural. If you’re using my trick to “seal” the tape, remember this time you’ll be using the grey 2121-30 on the upper mountain area and the white OC65 on the sky area to seal the tape.
If you added thumb tacks like I mentioned – yay! Just paint around them. You can use the tiny hole they make to redraw your line IF you happened to paint over it.
Step 7 – Paint Mountains on Bottom

Once the tape is sealed, you can paint the lower mountains. I used a darker grey colour in Benjamin Moore’s 2121-20 for the lower part of the mountain mural.
Step 8 – Tape Off the Snow Caps in the DIY Mountain Mural

If you’re painting snow caps on the mountain wall mural, tape them off. You’ll actually have to cut the tape in a 90 degree angle in some places before you press it onto the wall (as shown in my photo) to get the right angle.
Again, seal the tape using my trick and then paint the lighter coloured snow.
Step 9 – Paint the Snow Caps in the Mountain Theme Mural

I painted the snow caps in a very light grey (Benjamin Moore 2121-50).
Step 10 – Outline the Snow Caps if Needed

Since the light grey snow caps in my DIY mountain painting are a very similar colour to the white sky, I outlined them so they didn’t fade into the background.
Once the light grey paint dried in the snow caps, I simply added another piece of tape running parallel to the original tape, leaving a very narrow gap as the outline. I sealed the tape and used the dark grey paint to outline the tips of the snow caps.
Step 11 – Peel the Paint Off the DIY Mountain Mural

The most satisfying part of painting these mountain murals is ALWAYS peeling the tape off. It’s like striking something off a to-do list. YES!
Getting these crisp, clean paint lines is worth the extra time it takes to seal the paint, right?
I suggest pulling the tape off as soon as you can. If you let the paint dry too much, it’ll sometimes adhere to the tape and pull of the wall. If this happens, take an exacto knife and use the edge of the blade to hold the paint to the wall white you slowly pull the tape off.
Step 12 – Tape and Paint the Forest

Add a horizontal strip of painters tape 1′ from the floor so you know your forest will be the same height across the wall. Now create the forest silhouette by zig zagging pieces of painters tape in upside down “V” shapes. Again, you’ll have to cut exact angles in the “valleys” of the forest, but the tape can overlap at the “peaks” of the forest.
Now simply seal the tape and then paint it with the darker colour.
Step 13 – Position Triangles
If you’re going to paint triangles on the wall, there are a couple ways to do it.
Idea #1 – Make a Stencil
I made a “stencil” out of adhesive shelf liner and my cricut vinyl cutter. If you create your painted triangles this way, you can hang the stencils all over the room with a piece of painters tape first to see if you like the placement. When you’re ready, simply peel the backing off the contact paper and stick it to the wall.
Idea #2 – Use Tape
If you don’t have a vinyl cutter, print and cut out a triangle shape onto a piece of sturdy cardstock to use as a guide and then add painters tape around it throughout the room.


Step 14 – Paint Triangles


Step 15 – Peel the Triangles off the Wall
Once your triangles are stuck to the wall, seal them and then add your paint colour. I used one coat of yellow 2023-30 as a base and then painted three coats of Americana Yellow Gold shimmer paint over top. Most shimmery paint goes on streaky and translucent so it’s always a good idea to paint a base colour first.

Once the paint dries, just peel the stencil off and you’ll have a perfect triangle.
So What Did Mike Holmes Think of the Mural?

You’ll have to watch the episode on the DIY Network, HGTV or CTV Life to find out!
Some Pinterest Worthy Photos


Did my Tutorial Help You With Your DIY Mountain Wall?
Lemme see your masterpiece! My heart swells when I see photos of wall murals that my DIYers painted using my tutorials…so TAG ME! You can comment below, tag me on Instagram or Facebook or even leave a Google Review with a photo if this How-To really helped you.
DIY Wallpaper Murals
-
 Dragon WallpaperFrom:
$430.00$258.00 CAD -
 Dragon Festival Wall Mural
$530.00$318.00 CAD -
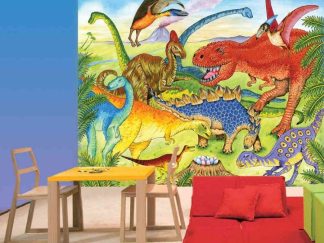 Dinosaur Wallpaper
$530.00$318.00 CAD -
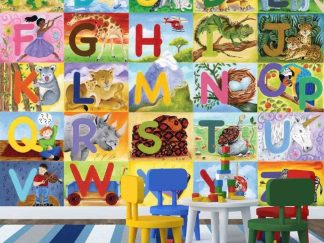 Alphabet WallpaperFrom:
$330.00$198.00 CAD
Fellow DIYers, if you love rolling up your sleeves AND murals, you’ll be obsessed with my wallpaper murals. They are easy to hang, removable, eco-friendly and ship free in Canada and the contiguous USA!
Sale Alerts
Join my newsletter community and you’ll get coupon codes, sale alerts and more inspiration like this!